

Second week of January, my 2012 Toyota Tacoma turned over like it was chewing through wet cement. 168,000 miles on the odometer, a battery barely two years old, and a forecast with five straight nights below freezing. I stood in my Sacramento garage with a cup of coffee going cold and did the thing I should have done back in November. I bought a battery maintainer. The NOCO GENIUS5 has lived on my workbench ever since, and it has already saved me one dead-battery Monday and one phone call to my wife for a jump start in the dark.
Here is the part nobody tells you when you buy a new battery. The battery usually is not what failed. The habit is what failed. Short trips to the hardware store, a week of the truck sitting while I carpool with a coworker, a cold snap that pulls cranking amps down right when the engine needs them most. A charger does not fix the habit. What it does is buy you the time to build one, and it beats standing in a parking lot at 6:40 in the morning waiting on a tow truck.
I am not a mechanic. I am a guy with a one-and-a-half-car garage, a rolling tool chest, and a dad who handed me a wrench when I was fourteen. Everything below is the routine I run now, in this order, roughly twice a month from November through March. None of it is complicated. All of it is easier than the alternative.
The 5-Amp Charger That Lives on My Workbench All Winter
The NOCO GENIUS5 is a 5-amp charger, trickle charger and maintainer for 6-volt and 12-volt batteries, lead-acid and lithium alike. It is rated at 8 hours for a full charge, it has a thermal sensor that adjusts to the temperature of your garage, and it moves from the truck to the weekend car in about fifteen seconds.
Amazon Check Today's Price on Amazon →What You Need Before You Start
None of this requires more than screwdriver-level skill. You need the charger, safety glasses, a rag, a small wire brush, a box of baking soda mixed with water in a spray bottle, and a wrench that fits your terminal bolts. A cheap voltmeter is worth keeping in the toolbox anyway. Give yourself twenty minutes the first time and ten minutes every time after that.
You do not need to remove the battery, and you should not. Modern vehicles get unhappy when they lose power, and you will spend more time resetting a radio and a clock than you saved. Leave it bolted in the tray, leave the cables on, and charge it where it sits. If your garage is detached and unheated like mine, wear gloves. Cold metal and cold hands is how a wrench ends up dropped across a battery post.
Step 1: Park It, Shut It Off, and Open the Door
Cold weather does not make a battery dangerous. Charging a battery in a closed garage does. Lead-acid batteries vent hydrogen while they charge, and hydrogen plus one spark is a mistake you only make once. I crack the garage door about a foot and leave it that way for the whole charge. If the weather is bad enough that you cannot open the door, wait for a better day. Nothing about this is urgent.
Turn the key off and take it out of the ignition. Let the truck sit for a few minutes before you do anything. If you just drove home from work, the battery is warm from the engine bay and the alternator has been pushing into it the whole way, so a voltage reading right now is not a true reading. Ten minutes of sitting gives you a number you can trust. Set the parking brake, chock a wheel, and leave the hood up.
The Miata is a different job because the battery lives under a panel in the trunk, which means I am pulling carpet back instead of reaching over a fender. Same rules apply. Key off, trunk open, give it a few minutes. Working in the trunk also means I have to be careful about setting tools on the paint, so I throw a folded moving blanket over the rear panel first. That blanket has saved me more grief than any tool I own.
Step 2: Look at the Terminals Before You Trust the Battery
Before you clamp anything, look at what you are clamping to. I want clean metal, tight terminal bolts, and a battery case with no cracks and no bulge in the sides. A bulged case means the battery has been cooked or frozen and it is finished. A white or green crust around the posts is corrosion, and it adds resistance that makes a healthy battery act like a weak one.
Mix a spoonful of baking soda into a spray bottle of water, spray it on the crusted posts, and let it fizz for a minute. Scrub with the wire brush, wipe it dry with the rag, and tighten the terminal bolts. Do not hammer a terminal down onto a post. If a clamp will not tighten, replace it, because a loose clamp will leave you stranded just as reliably as a dead battery.
Then put the voltmeter on it. With the engine off and nothing running, a healthy 12-volt battery sits around 12.6 volts. Down near 12.2 and it has been sitting too long without a charge. Under 12 and you are looking at a battery already on its way out. Write the number down. It is the only way to know a month from now whether the charger is winning or you are just delaying a purchase.
Step 3: Clamp It Before You Plug It In
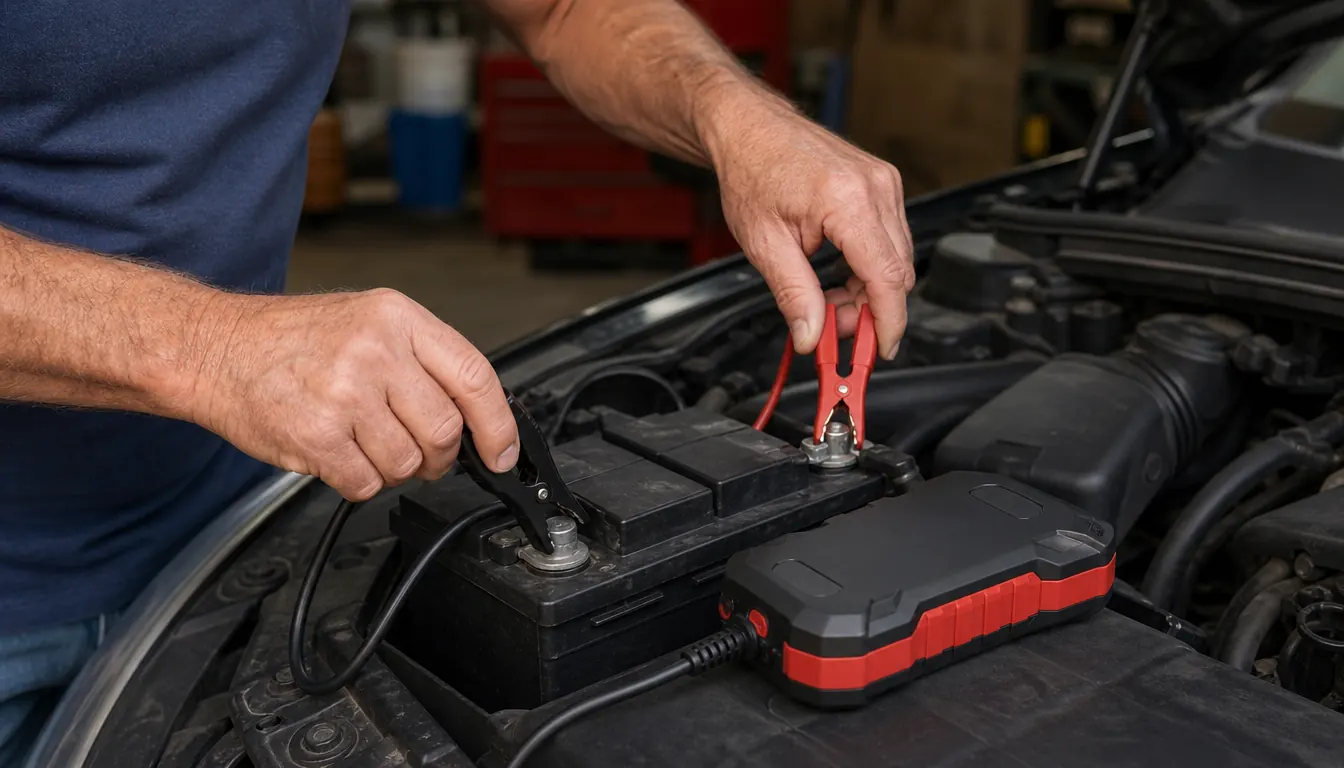
Order of operations matters here. Leave the charger unplugged from the wall. Connect the positive clamp to the positive post first, then connect the negative clamp to the negative post. Positive, then negative. Doing that in reverse while the charger is live is how people get a spark directly on top of a battery that is venting gas.
Push each clamp until it bites. A clamp resting lightly on a post looks fine and does nothing. I wiggle mine side to side after I set it, and if it moves, I reseat it. The NOCO unit uses battery clamps on a cable, so there is no ring terminal to bolt down and nothing permanent to install. That is the whole reason I can move it between the truck and the Miata in fifteen seconds flat.
Last thing before you plug in: route the cord so it cannot get pinched. I run mine out the front of the hood and along the floor, never across the gap where the hood closes. A hood will cut a cord in half without any drama, and you will not notice until the battery is flat again in March.

Step 4: Set It to 12 Volts and Walk Away
Both of my vehicles are 12-volt systems, so that is where the charger goes. It handles 6-volt and 12-volt, lead-acid in all its forms, and lithium, so it covers pretty much anything a home garage sees. The output is 5 amps. For a battery that is only mildly low you are looking at a few hours. NOCO rates a full charge at 8 hours, and in my garage that estimate has been close enough.
The integrated thermal sensor is the part that actually matters in January. It adjusts the charge based on the ambient temperature, so a battery sitting in a 38-degree garage gets treated differently than one in a 75-degree garage in June. Cold batteries accept a charge differently, and a charger that ignores temperature is guessing. This one is not.
Then leave it alone. This is the hardest step for me, because I like to stand there and watch. There is nothing to watch. It will take hours, the unit will get slightly warm, and you should go do something else. Check on it once before bed and once the next morning. Do not unplug early because the battery seems fine. The goal is fully charged, not mostly charged.
Step 5: Unplug First, Then Unclamp, Then Leave It On
Reverse of how you started. Unplug the charger from the wall first, then take the negative clamp off, then the positive clamp. Once the clamps are off, wipe the posts down one more time and put a light coat of terminal protectant on them if you have any. Then close the hood and start the engine to confirm it caught on the first try.
Here is the change I made after that first winter. I stopped treating the charger as a rescue tool and started treating it as a maintainer. The Miata sits for weeks at a time between drives, and a battery that sits discharges slowly whether you use it or not. So the NOCO stays connected to the Miata for most of the winter, and the truck gets a night on it whenever the forecast turns ugly. That is the entire routine.
The GENIUS5 is small. It measures roughly 3.4 inches deep by 4.6 inches wide by 8 inches tall, about the footprint of a thick paperback standing on end, so it sits on the bench without taking up the space a rolling cart would. In summer I coil the cord, hang the whole thing on a hook, and forget about it until the first cold front shows up in the forecast.
Six weeks of sitting in a 41-degree garage, and the Miata started on the second crank. The only thing I did was leave a charger connected.
What Else Helps
Clean terminals and a tight hold-down are half the battle, and both are free. A battery that can slide around in its tray will rattle its own internals apart over a few winters. Check the hold-down bracket and the tray for rust while you are in there. If the tray is rusted through, fix that before you spend another winter charging a battery that is bouncing around every time you take a corner.
Be honest about what a maintainer can and cannot do. It will not resurrect a battery that has already sulfated, it will not fix a failing alternator, and it will not cure a parasitic drain that pulls your battery down every night. Those are separate problems with separate fixes. What it will do is keep a healthy battery healthy through the months when your vehicle is not doing the job itself. That is a smaller promise than most product pages make, and it is the one that holds up.
One more thing I learned the slow way: check the date code on the battery. Most carry a sticker with a month and year on the case. If the battery is six or seven years old in a cold climate, a charger buys you a few more weeks, not a few more winters. Start budgeting for a replacement before it strands you somewhere without cell service.
And if you want to go deeper on the unit itself before you buy, I wrote up the longer version of living with it day to day, plus a head-to-head against the other maintainer most people compare it to. The short version is that this one has stayed on my bench and the other one lives in a drawer.
If Your Battery Has to Start in February, Give It a Head Start in November
The NOCO GENIUS5 is a 5-amp smart charger and maintainer with battery clamps, a thermal sensor, 6-volt and 12-volt support, and a 3-year limited warranty. It is the least interesting tool in my garage and the one I would replace first if it walked off.
Amazon Check Today's Price on Amazon →